次にスクリプトを改良していきます。
・「Ballスクリプト」をダブルクリック。
・「★の部分のコードを削除&追加」しましょう。
using UnityEngine;
using System.Collections;
using UnityEngine.SceneManagement;

public class Ball : MonoBehaviour {

	public float move_speed;
	public float jump_speed;
	public AudioClip coinGet;
	private Rigidbody rb;
	private int count;
	private bool isJumping = false;

	void Start () {

		rb = GetComponent<Rigidbody>();
		count = 0;
	}

	public int Coin(){
		return count;
	}

	// ★Updateメソッド(命令ブロック)の中身を「全部削除」しましょう。
	void Update () {

	}

	void OnCollisionEnter(Collision coll){
		if(coll.gameObject.CompareTag("Floor")){
			isJumping = false;
		}
	}

	void OnTriggerEnter(Collider other){

		if(other.CompareTag("Coin")){
			Destroy(other.gameObject);

			AudioSource.PlayClipAtPoint(coinGet, transform.position);

			count = count + 1;

			if(count == 4){
				Invoke("ReturnToFile", 0.5f);
			}
		}
	}

	void ReturnToFile(){
		SceneManager.LoadScene("GameClear");
	}


	// ★スマホ対応(コントロールボタン)
	// 下記のコードを追加してください。
	public void Jump(){

		if(isJumping == false){
			rb.velocity = Vector3.up * jump_speed;
			isJumping = true;
		}
	}

	public void LeftMove(){
		rb.velocity = Vector3.left * move_speed;
	}

	public void RightMove(){
		rb.velocity = Vector3.right * move_speed;
	}

	public void ForwardMove(){
		rb.velocity = Vector3.forward * move_speed;
	}

	public void BackMove(){
		rb.velocity = Vector3.back * move_speed;
	}

	// ★ここまで
}
・スクリプトの改良ができたらチェック。
・「RightButton」オブジェクトをクリック
・「Inspector」で「+」ボタンをクリック

・「Ball」オブジェクトを空欄にドラッグ&ドロップ
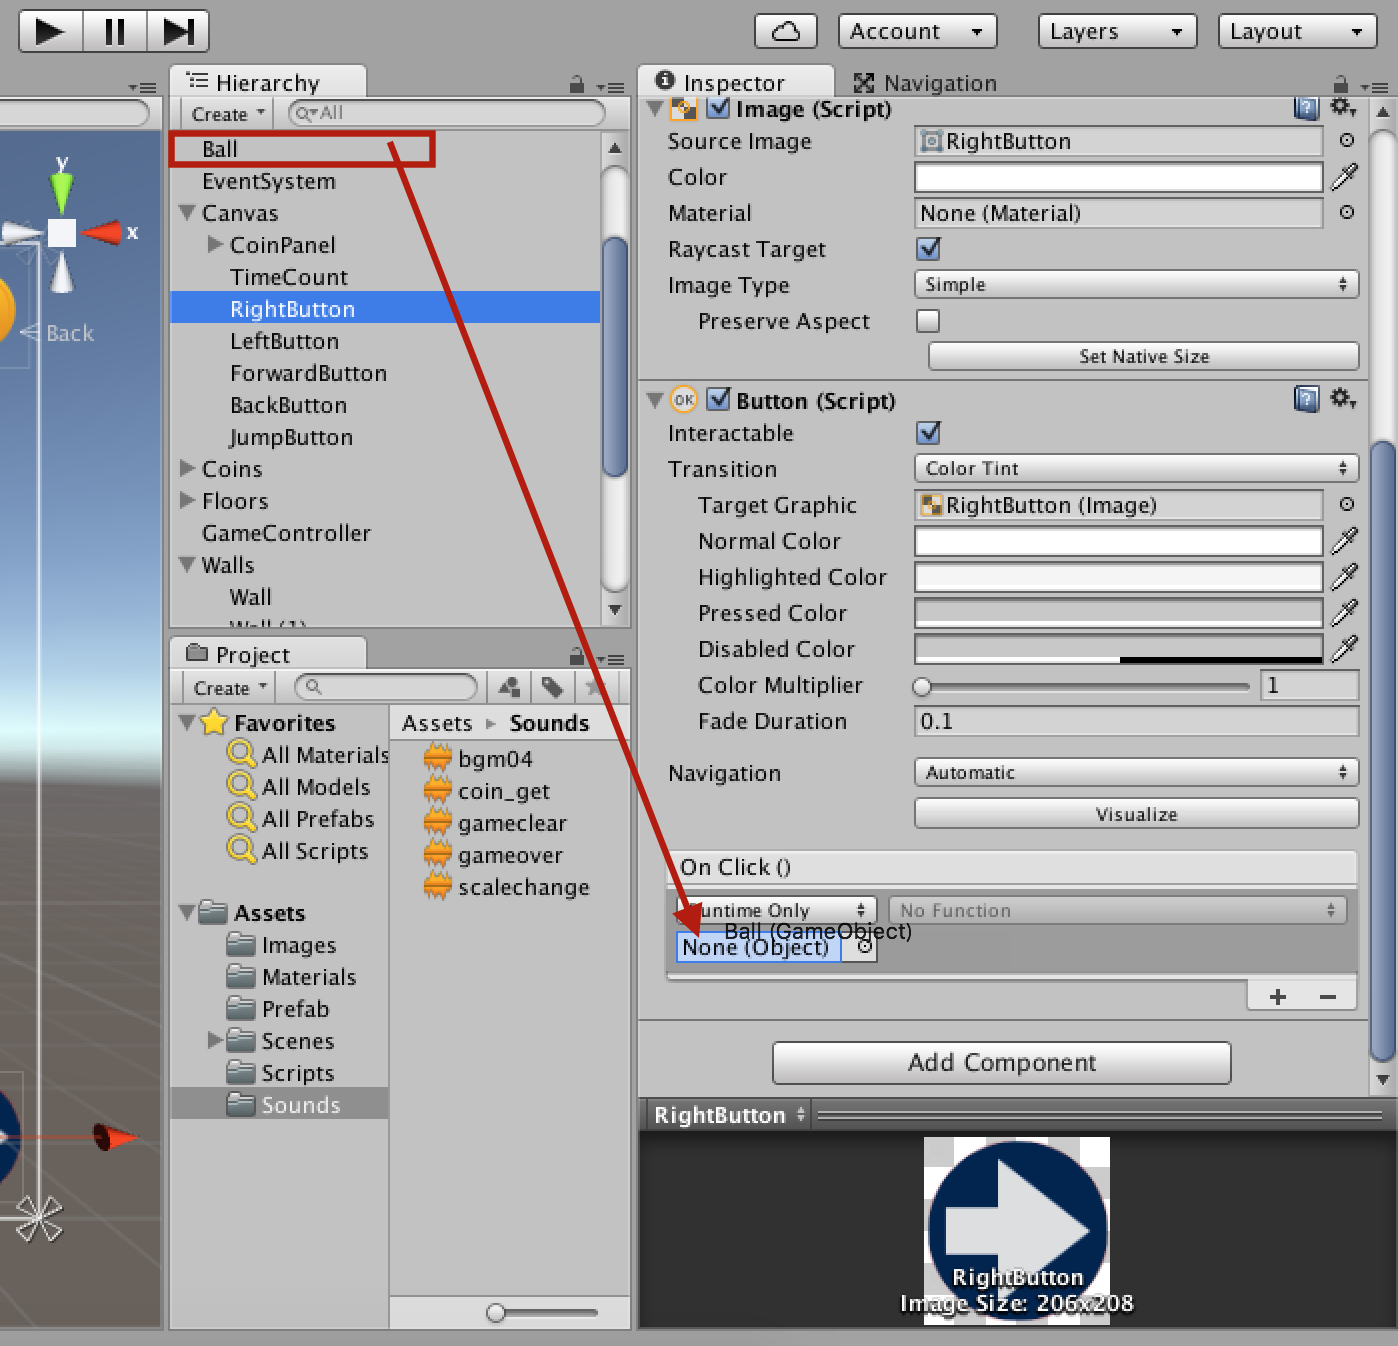
・「No Function」をクリック→「Ball」を選択→「RightMove()」を選択してクリック

これで1つ目のボタンの設定が完了です。
・再生ボタンを押してみましょう。
・RightButtonアイコンを押した時に、Ballが右方向に動けば成功です。

*この作業を全ボタンで行いましょう。